I built my first gaming PC in a basement with a screwdriver and zero confidence.
It crashed three times before I got Windows to load.
You’re probably staring at a pile of parts right now.
Or worse. You’re still stuck on Google, wondering if this is even worth the headache.
It is.
How to Build a Gaming Pc Pmwgamestation isn’t some vague promise.
It’s a real guide.
Written by someone who fried a motherboard (twice) and learned what actually matters.
No fluff. No jargon dressed up as wisdom. Just what you need, in order, with no skipping steps.
You’ll pick parts that work together (not) just look good on paper. You’ll install them without breaking anything (I’ll tell you where people always slip up). And you’ll boot into Windows without panic.
This isn’t about saving money just to save money. It’s about knowing your machine inside out. About fixing it yourself when something goes wrong.
About building something that lasts longer than the next sale.
You’ll finish this guide ready to build.
Not “someday.”
Today.
Plan Before You Plug
I start every build with a list. Not a wishlist. A real list.
One that fits my wallet.
You need to know your budget before you look at any part. (Because nothing kills momentum faster than falling in love with a $600 GPU when you only have $500.)
That’s why I always go to How to Build a Gaming Pc Pmwgamestation first (not) for parts, but for realistic combos that actually work together.
CPU is the brain. GPU is what makes games run. Motherboard holds them both.
RAM is fast memory. SSD boots fast. HDD holds old movies and game backups.
PSU powers it all. Case keeps dust out and air moving.
I check socket type. I match RAM speed and generation. I verify PCIe version.
I do not guess.
PCPartPicker.com catches most mistakes. I use it. You should too.
(It flags conflicts before you ship anything.)
What games do you play? Right now. Not “someday.” Not “if I get better at Fortnite.”
If you’re playing Elden Ring on Ultra, you need more GPU than someone running League of Legends at 1080p.
You don’t need top-tier everything. You need balance.
And you definitely don’t need a $300 case with RGB fans if your PSU can’t handle your GPU.
Build smart. Not flashy.
Tools Before You Touch a Screw
I grab a magnetic Phillips head screwdriver first.
It’s the only one I use for builds.
An anti-static wrist strap? Non-negotiable. You fry a $400 GPU with one zap (and) you won’t even feel it.
Clear off your kitchen table. Light matters. So does space.
Enough to lay out the motherboard, CPU, and all those tiny screws without losing them in the carpet. (Spoiler: you will lose one.)
Open every box before you start. Check parts against the list. Keep manuals close (even) if you think you know it all.
This is how to build a gaming pc Pmwgamestation without rage-quitting at 2 a.m.
You’ll thank yourself later.
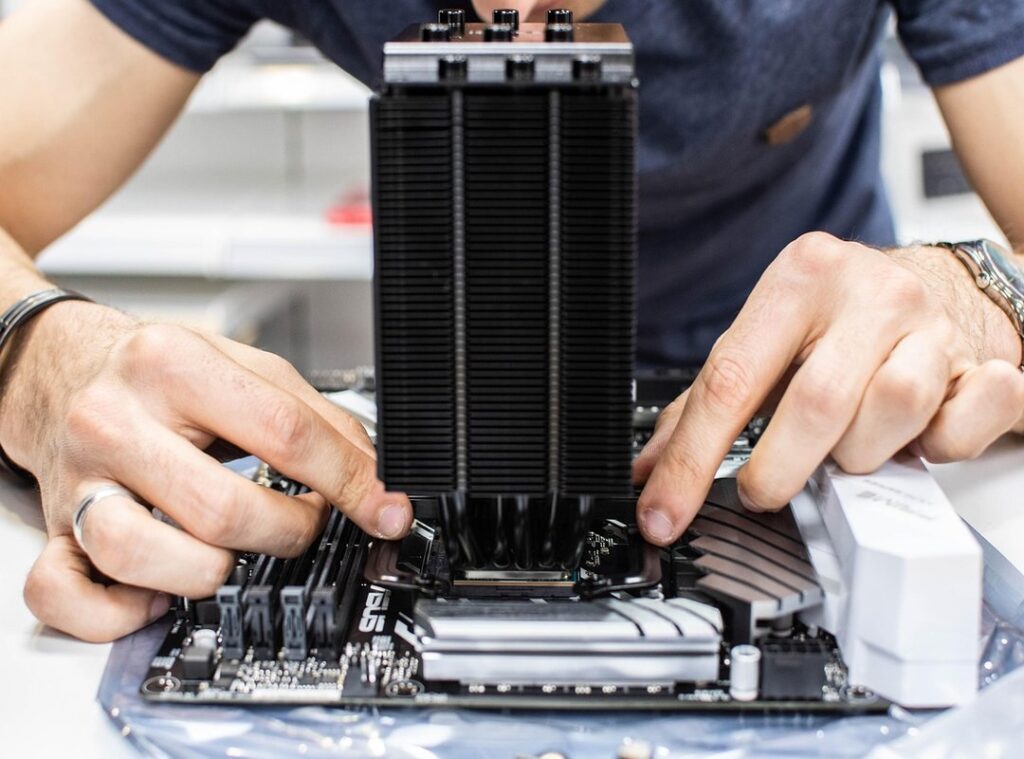
CPU, Cooler, and RAM. Get This Right or Everything Else Fails
I open the CPU socket lever. I look for the tiny arrow on the chip. I line it up with the arrow on the socket.
I do not force it. (You will bend pins if you force it.)
The lever clicks down. That’s it. Done.
Now the cooler. Stock or aftermarket (doesn’t) matter. If the paste isn’t pre-applied, I dab a pea-sized amount in the center.
No swirls. No spreading. Just one dot.
Then I mount it straight down. Even pressure. Tighten screws diagonally.
Not all at once.
RAM goes in next. I spread the clips. I match the notch.
I press down. Hard — on both ends until they snap. I hear it click.
That’s the sound of dual channel working.
You’re building a gaming rig, not a toaster. These three parts talk to each other constantly. Mess up the CPU seating?
You get no signal. Skimp on thermal paste? Your CPU throttles before the first game loads.
Stick RAM in wrong? You get silence. And panic.
This is where most people stall. Or break something. Or skip reading the manual.
(Spoiler: your motherboard manual has a diagram for which slots to use.)
Want to know what happens after this? Like how your GPU talks to that CPU. Or why your monitor choice matters just as much?
Check out the Guide to Gaming Monitors Pmwgamestation.
How to Build a Gaming Pc Pmwgamestation starts here. Not with cables. Not with fans.
With these three pieces. Get them right.
Mounting the Motherboard and GPU

I drop the motherboard in like it’s fragile. It’s not. But I still hold my breath.
You line up the ports with the I/O shield first. That metal plate? It snaps into the case back.
If it doesn’t fit, you’re forcing it. Stop.
Standoffs go in next. Check your manual. Some cases have them pre-installed.
Some don’t. If yours don’t, skip that step and wonder why the manufacturer assumed you’d read the fine print.
Now place the board. Line up every screw hole. One misaligned standoff means bent pins or a cracked board.
Been there. Didn’t like it.
Screw it down. Not too tight. Just snug.
Over-tightening cracks the PCB. (Yes, I’ve done that too.)
GPU time. Pop the PCIe slot latch. Slide the card straight in.
No wiggling. No angle. Push until it clicks and sits flush.
Then screw it to the case. Don’t forget that.
Power cables come last. Plug them in before closing the case. You’ll curse yourself later if you don’t.
This is how to build a gaming pc Pmwgamestation (no) magic, just patience and attention.
Still think you need thermal paste on the GPU? (You don’t.)
Final Hookups: Storage, Power, and That Clean Look
I plug in the drives first. SSDs go in their slots. HDDs get screwed in.
SATA data cables snap into the motherboard. Power cables click into the drives. Done.
The PSU goes in next. I slide it into place and tighten the screws. Then the big 24-pin ATX cable.
It only fits one way. The 8-pin CPU power cable follows. It’s near the top-left corner.
I double-check the pin alignment.
Front panel cables? Yeah, they’re annoying. Tiny wires for power button, reset, USB, audio.
I open the motherboard manual. Every board is different. If you skip this step, your PC won’t turn on.
(And yes, I’ve done that.)
Cable management isn’t optional. It’s airflow. It’s heat control.
It’s not just about looks (tangled) cables choke your fans. I use velcro straps. No zip ties unless I’m sure I won’t need to move anything later.
You’re almost there. One more thing (if) you’re asking why you’re doing all this work, maybe ask yourself what gaming gives you beyond fun. Check out Why Is Gaming Good for You Pmwgamestation.
You’re Done. Go Play.
I built my first PC in a garage with a screwdriver and zero confidence.
You just did it too.
That moment when the fans spin up? That’s yours. No middleman.
No markup. Just you and a machine that answers to your commands.
You saved money. You learned something real. And now you’ve got a rig that works (not) one that might, if you’re lucky.
Still stuck on drivers? Windows activation? Game install hiccups?
That’s why How to Build a Gaming Pc Pmwgamestation exists.
It’s not theory. It’s what I wish I had before I bricked my first BIOS.
Grab the guide. Follow the steps. Stop guessing.
Start gaming.
Your seat at the table is ready.
Pull it up.